AWS Account Setup
You can deploy and build this workshop application EITHER in an AWS-provided temporary account provided by your AWS team at an AWS-managed event, OR use your own development account if you’re following at an event hosted outside of an AWS-managed event or taking in the workshop at your own pace at home, school or work. Choose one of the following two sections below as applicable to your situation, and then continue on from “Machine Setup”.
At an AWS-hosted Live event (workshop) ?
- Use the hashcode provided by AWS team and enter it into to your AWS account. Event Engine - Team Dashboard
- Pick Email One Time Password OTP, accept the terms, and login.
- Check your email for a one time password to login. Afterward, you will see a dashboard.
- Click on Set your Team Name in the dashboard by entering your name. This will help the workshop support team to help you troubleshoot when you need it.
- Click on the AWS Console button. This will bring up a popup window AWS Console Login.
- Click on Open AWS Console. This will log you into the AWS account.
- You will use this account for the entire workshop duration.
- Go to “Machine Setup” below.
Self-paced or at a non-AWS event
- Login to your AWS account and make sure you’re working in the same AWS Region as you used to create your Momento cache and auth token.
- Go to “Machine Setup” below.
Machine Setup
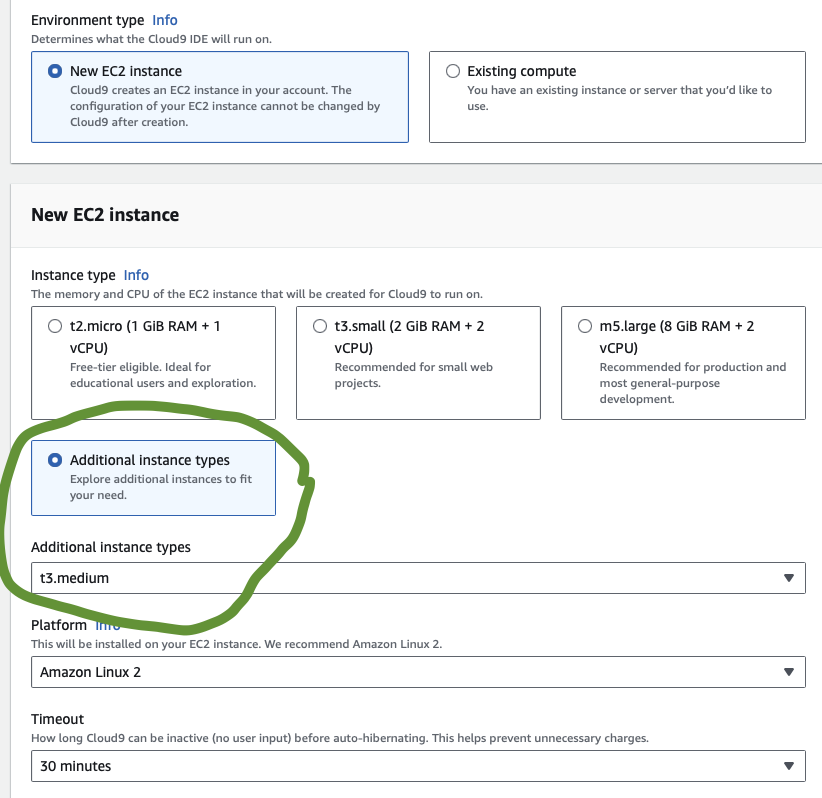
Cloud9 provides a simple way to walk through this workshop with an environment that already has all the required prerequisites. From the Cloud9 console (you can quickly find this by typing Cloud9 into the search bar of the AWS Console landing page), you can create a new environment. You might want to name the environment “momento_workshop” to make it easy to identify later. You should also choose the t3.medium instance type as this is the smallest with enough memory to complete all steps in this workshop.
Once your new Cloud9 environment is created, you’ll see it listed in the Cloud9 console. Select it, and click on “Open in Cloud9”. It may take a short time to start up, but once it is running, refer to the screenshot below for next steps.
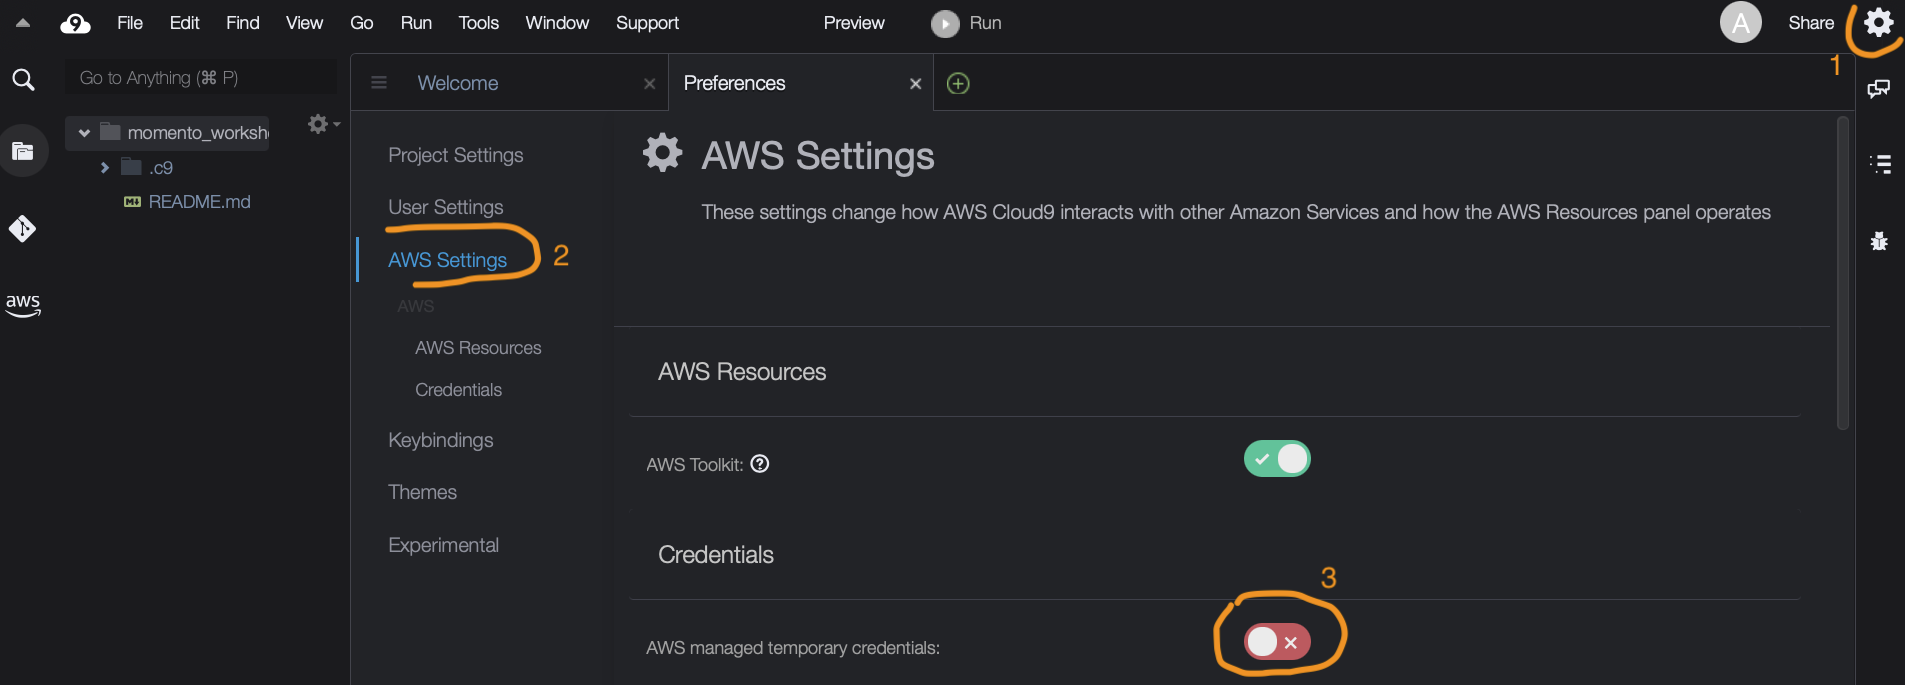
When the environment is ready, open Preferences and scroll to “AWS Settings”. Disable the AWS-managed temporary credentials. Now you can close out the Preferences panel and continue.
You can also use your own local environment on your laptop or desktop if you prefer (and you don’t mind installing any missing prerequisites).
Prerequisites (for your local environment)
Please install the following software on your machine if it is not already there (these are already included in Cloud9 environments):
- AWS CLI - used to configure AWS credentials on your machine
- SAM CLI - used to build and deploy the pizza API
- NVM - used to install Node.js and npm
- Git - used to clone workshop source code
AWS CLI authentication configuration (both Cloud9 and local environment)
NOTE: If you’re using a temporary AWS-provided environment at an AWS event, you can skip this section, and instead just give the Cloud9 SSM Role administrator level privileges (this will allow it to deploy CloudFormation stacks, create resources for the lab, etc). Here’s how to do this:
- Go to the IAM console, and look at the Roles.
- Find the AWSCloud9SSMAccessRole.
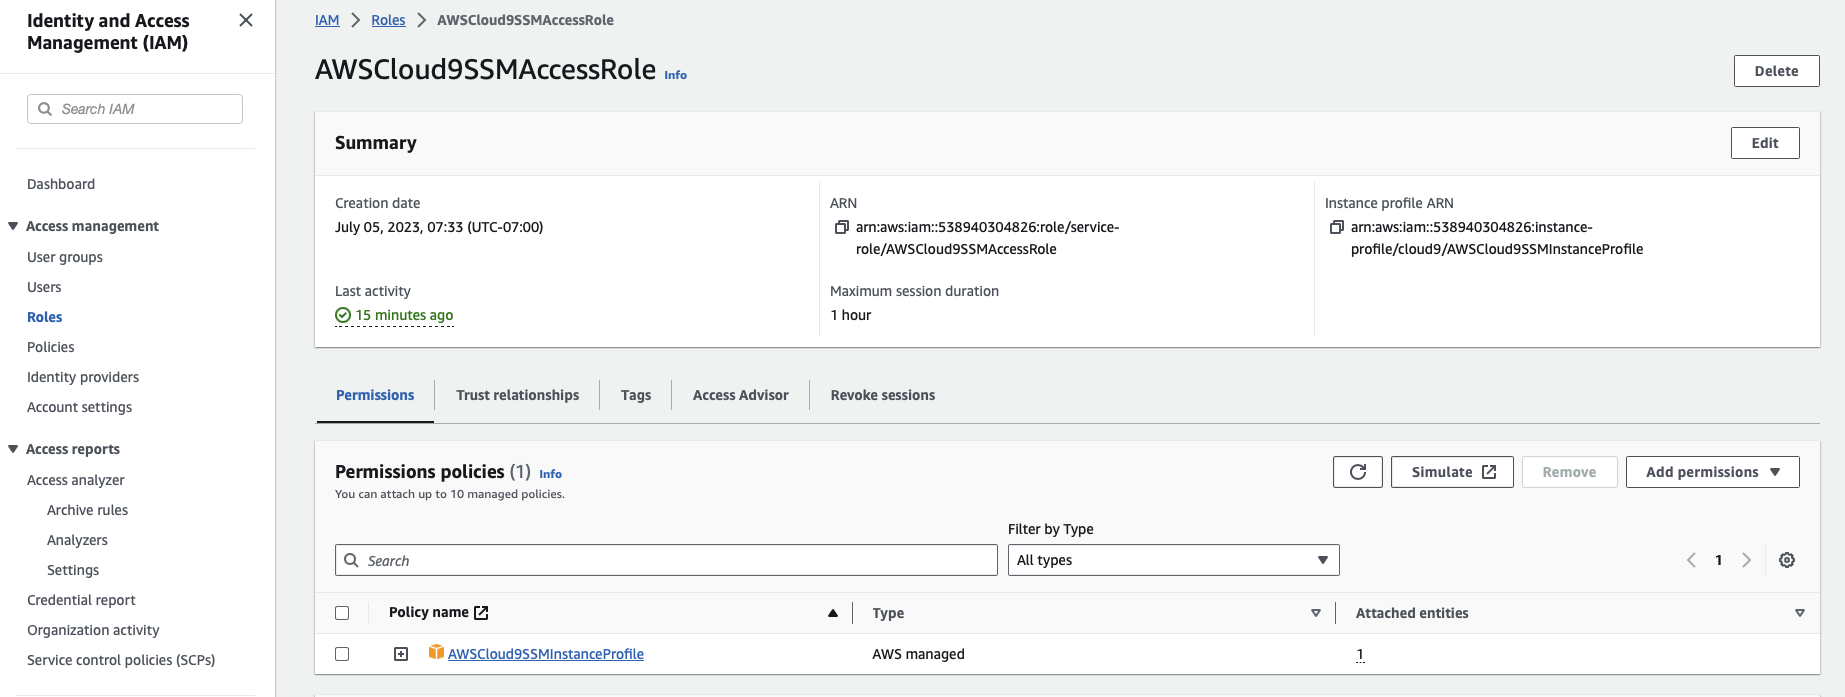
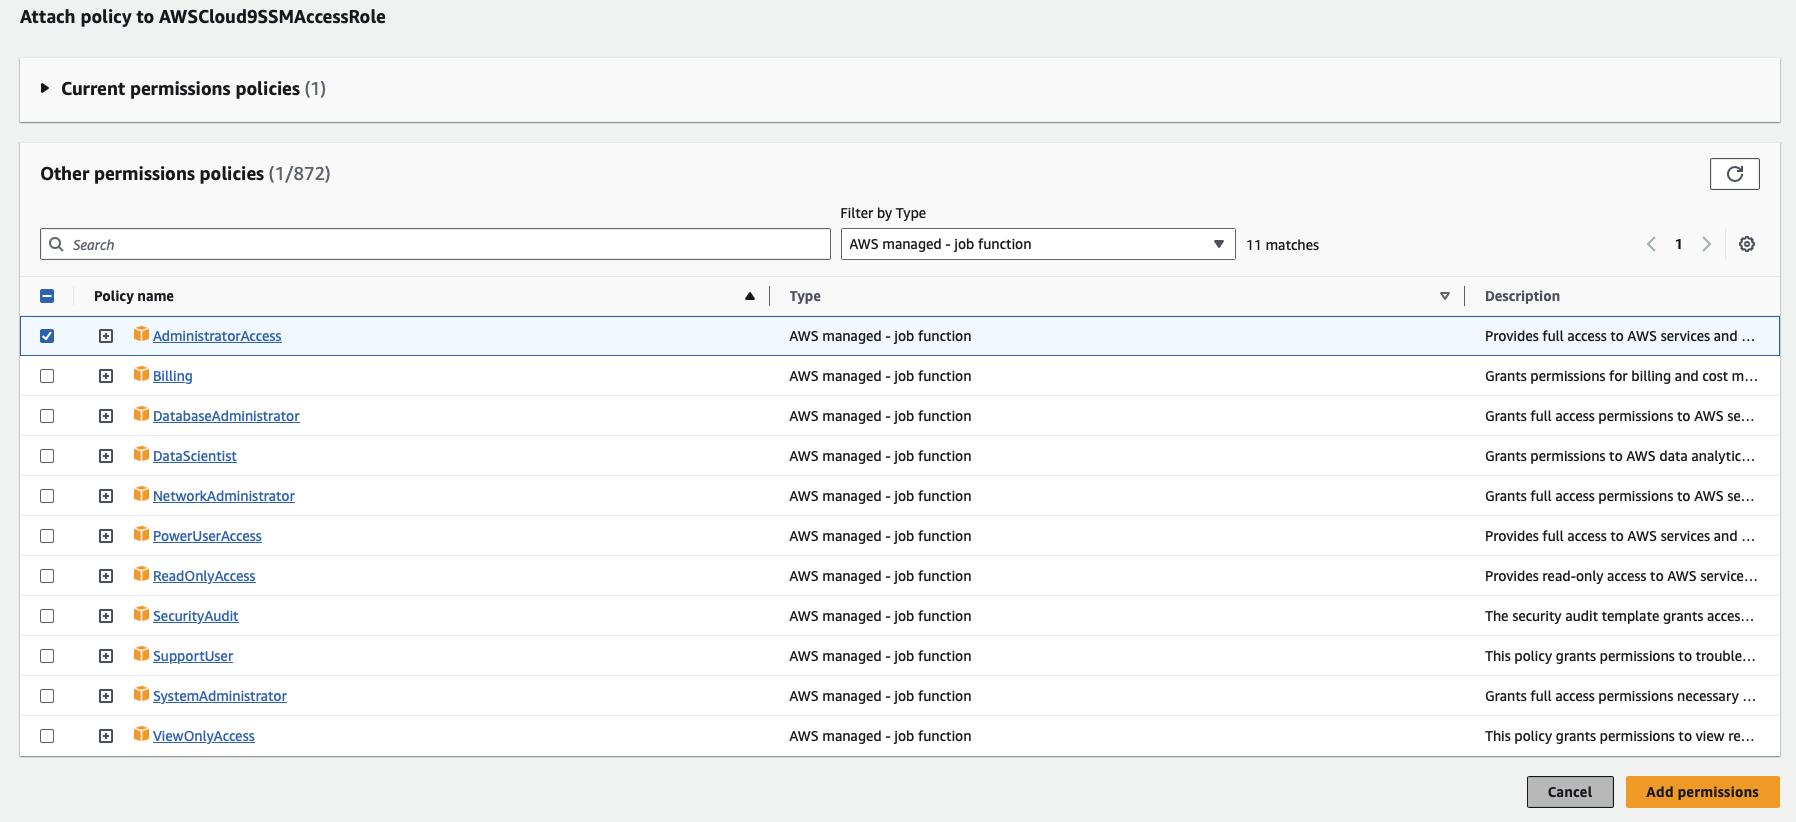
- Add permissions and give Administrator privileges.
- That’s it - close out the IAM console and continue below at “Source Code”.
[Using your own environment? You’ll need the information below!] You will need to setup the AWS CLI to point to your AWS account. If you have not done this before, please follow the guide from AWS. You’ll need to configure credentials in Cloud9, and if your local laptop/desktop is not already configured you’ll also need to follow this procedure. IMPORTANT: be sure to configure your default region to be the same region where you created your new Momento “pizza” cache. To simplify the access requirements, it’s recommended that you login using credentials for a user/role which has AdministratorAccess or PowerUserAccess policy applied. Identities in production accounts are likely to be more restrictive - it’s simplest to use an AWS-provided temporary account or use a personal dev account and login as Admin. You can use the shell window at the bottom of the Cloud9 IDE screen for this, or use your own shell on your local environment.
A couple of tips:
- If you’re using single sign-on (SSO) you’ll want to avoid specifying an SSO session name during the configuration - while this is normally recommended, it can cause some errors when deploying using SAM as we do later in the workshop.
- You can verify that everything is setup correctly using the
aws sts get-caller-identitycommand.
Source Code
The source code for the workshop is in GitHub. Please clone the momento-pizza-app repository to your Cloud9 or local environment. You can use the following command in a terminal to clone to your git directory and make the cloned repo your current directory.
git clone https://github.com/momentohq/momento-pizza-app.git
cd momento-pizza-app
We did it! We’re now fully setup with Momento and AWS - time to work with some code 🚀